Embed Acceptance via Ironclad Signature
Embed the Ironclad Signature experience for a signer within an iframe.
Goal
Technical audiences will learn how to embed Ironclad Signature's acceptance experience directly in their own application. Example use cases/flows include:
- Customer Order Form signature in an in-app Marketplace
- Commercial Lease signatures via a Portal
- New Partner onboarding flow featuring acceptance of associated Legal Terms
Overview
This guide covers the steps for embedding Ironclad Signature in your own page, including how to launch the workflow, retrieve the embeddable iframe URL, and record acceptances.
Prerequisites
- A Workflow configuration is created and published using Ironclad Signature with permission to copy a signing link.
- This requires the Company Setting of "Allow users to copy signing links" to be turned on.
- Within the Sign > Settings tab of the workflow configuration, set "Who can copy a signing link?" to the appropriate users.
- Within Sign > Settings, also disable the "Enable default signature request email" to ensure that users only sign within the embedded experience.
- Public API access and OAuth Application created with the following scopes:
public.workflows.readSchemaspublic.workflows.createWorkflows- (Optional)
public.workflows.readWorkflows - (Optional)
public.workflows.sendSignatureRequests public.workflows.createEmbeddableSignerUrls
- Familiarity with using the API to Launch a Workflow
- (Optional) Instead of polling the workflow status using the
public.workflows.readWorkflowsscope, the alternative approach is to listen for the workflow_signature_packet_sent Webhook event.
Note: This guide and any software contained in it should be used at your own risk by individuals qualified to evaluate its effectiveness. IT IS PROVIDED “AS IS”, WITHOUT WARRANTY OF ANY KIND, EXPRESS OR IMPLIED, INCLUDING BUT NOT LIMITED TO THE WARRANTIES OF MERCHANTABILITY, FITNESS FOR A PARTICULAR PURPOSE AND NONINFRINGEMENT. IN NO EVENT SHALL IRONCLAD BE LIABLE FOR ANY CLAIM, DAMAGES OR OTHER LIABILITY, WHETHER IN AN ACTION OF CONTRACT, TORT OR OTHERWISE, ARISING FROM, OUT OF OR IN CONNECTION WITH YOUR USE OF THIS GUIDE OR ANY SOFTWARE IT CONTAINS.
Your use of the Ironclad API must comply with Ironclad’s API Terms of Use (available at https://legal.ironcladapp.com/api-terms-of-use ) and the terms of the Enterprise Services Agreement (or equivalent) entered into between you and Ironclad.
Details
Steps
A typical end-to-end embedded signature implementation includes the following steps:
- Launch the Workflow
- Wait for the Workflow to reach the Sign Step
- Create an Embeddable Recipient URL
- Render the iframe
Launch the Workflow
Following a successful workflow launch (see the companion guide Launch a Workflow), you will obtain a Workflow ID which will be used in the following steps.
Await Signature Ready State
Once you have launched the workflow, it needs to reach the sign step and generate a signature request before you can generate an embeddable URL. To create a seamless embedded experience, we recommend configuring the workflow to automatically progress to signing without internal approvals.
To do this, remove any approvers from the workflow (or conditionally exclude them)
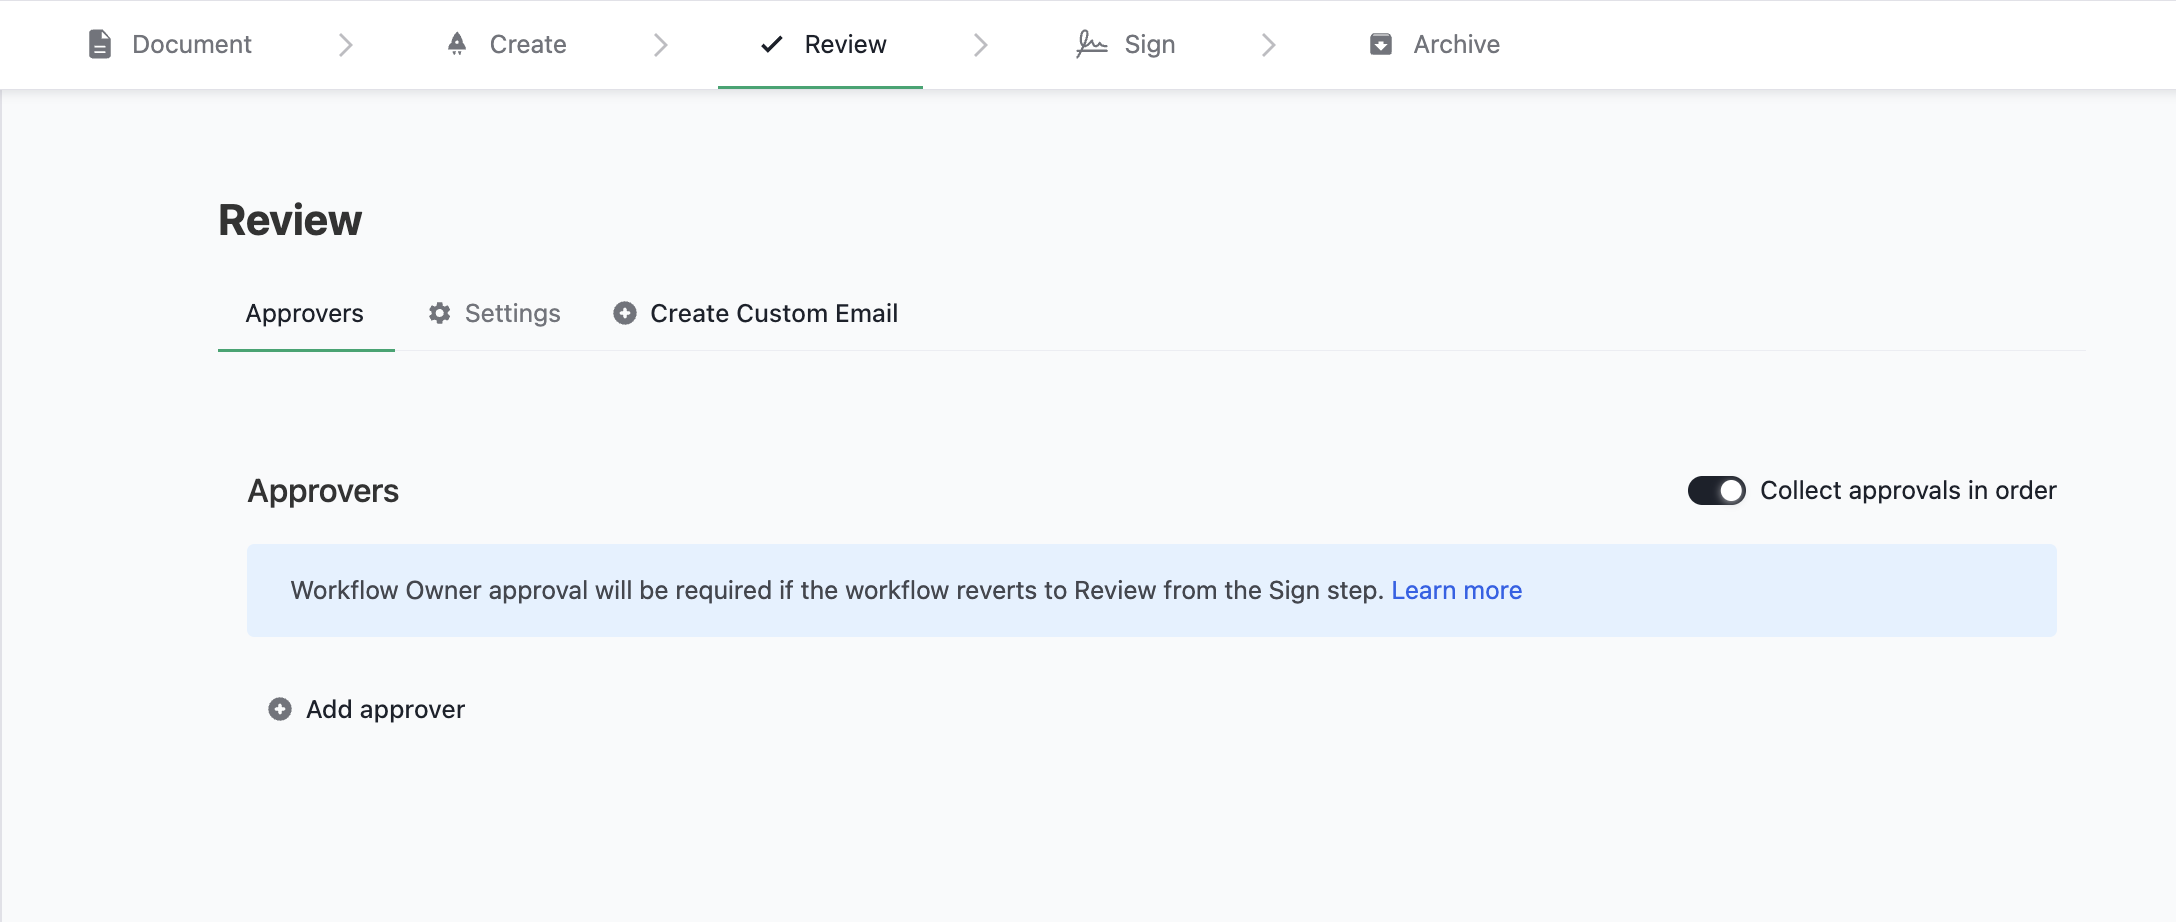
and toggle the eSignature request trigger to Automatically sent after last approval.
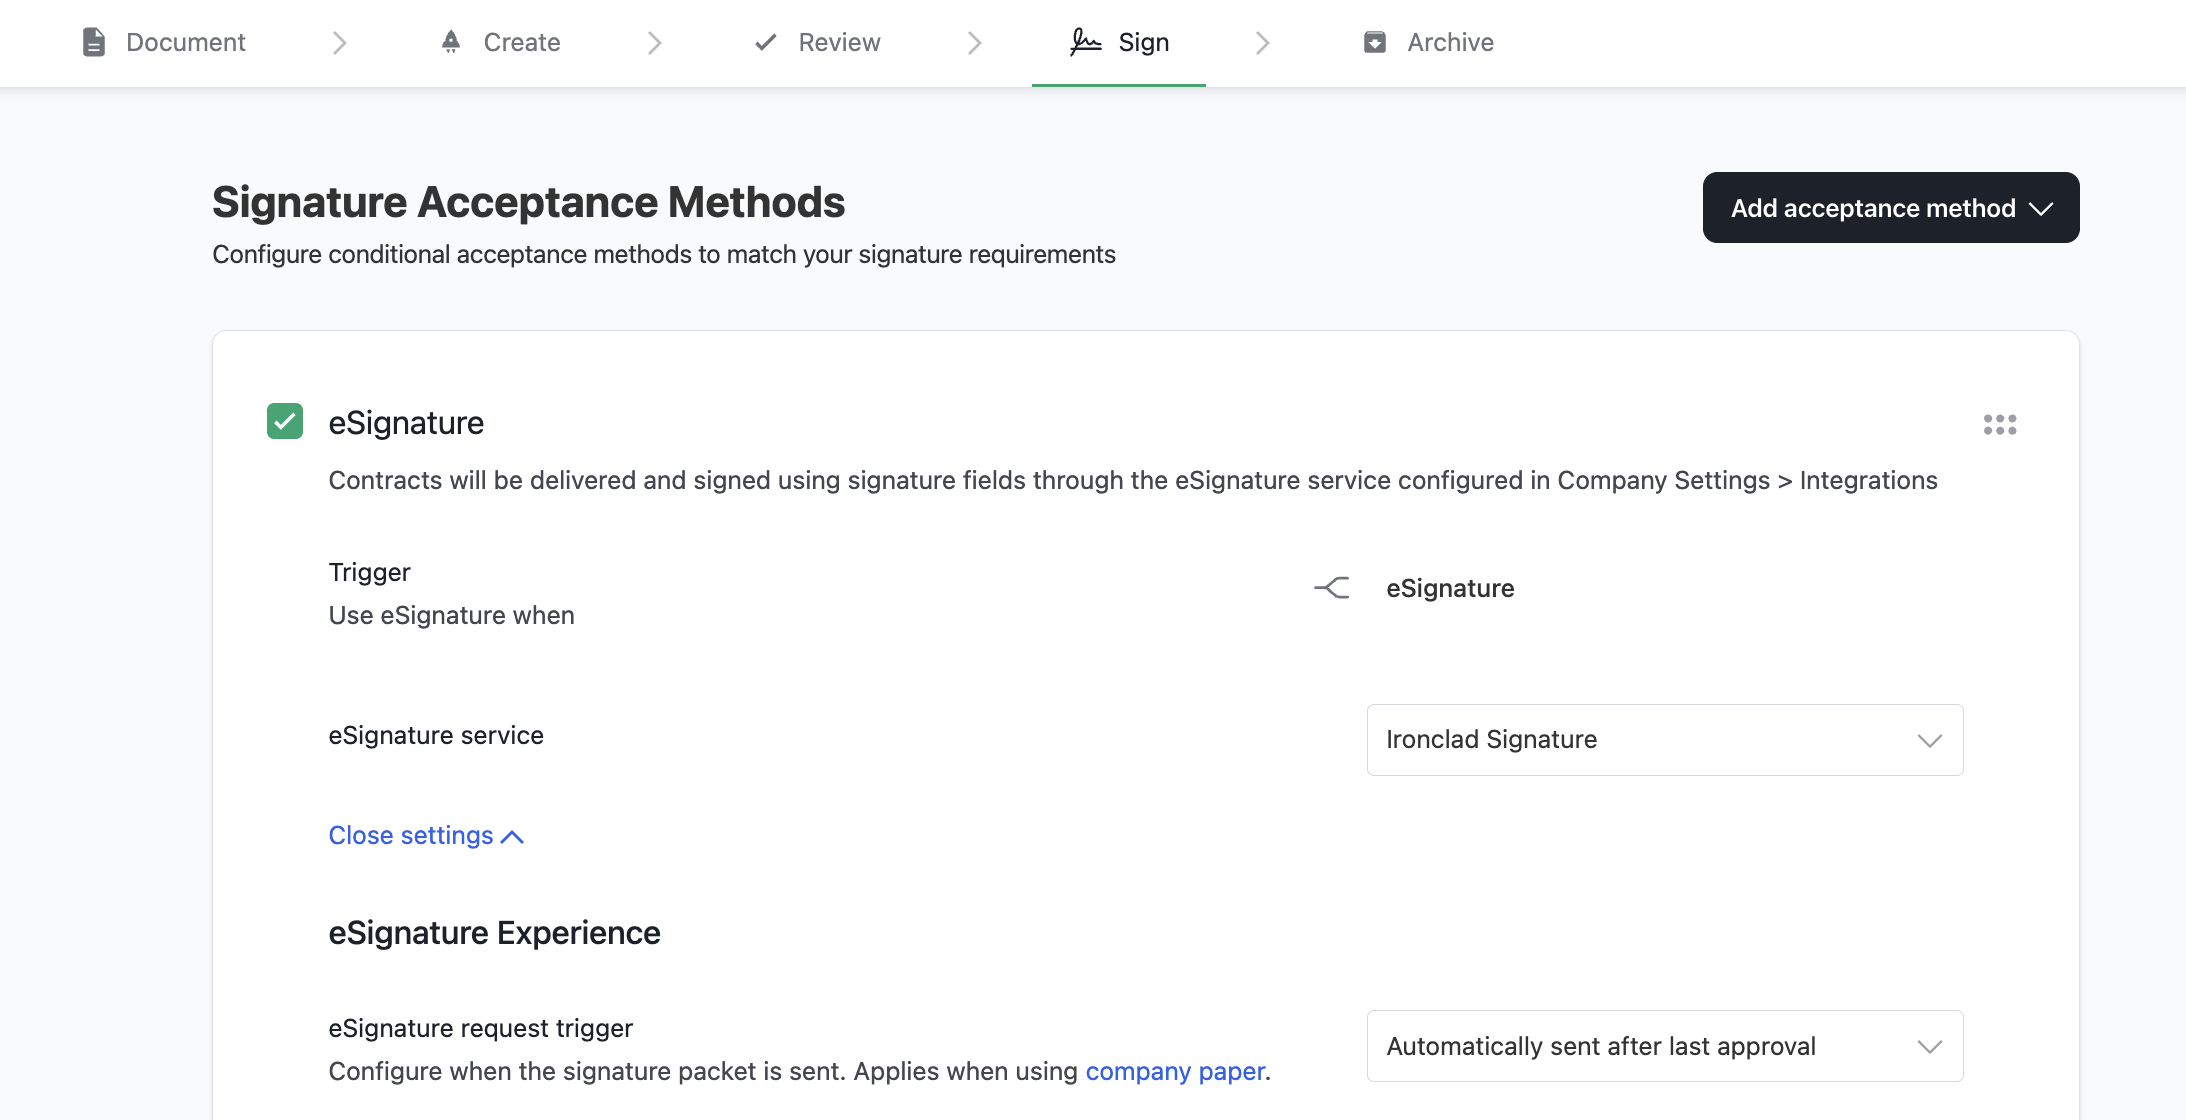
Without this automatic signature request creation, a separate call to Create a Signature Request would be required before retrieving the embeddable URL.
However you configure the workflow, there are two approaches to determining whether the workflow signature request has been sent and is ready to be embedded: (1) Poll the Retrieve a Workflow endpoint until the workflow reaches the Sign Step (observing documented Rate Limits) or (2) Listen for the workflow_signature_packet_sent Webhook event. Both options require the Workflow ID obtained in Step 1.
Create an Embeddable Recipient URL
Now that the signature request has been sent, you can create the embed URL suitable for the iframe. To do so, use the Create an Embeddable Recipient URL for a Signer endpoint and specify the roleName (e.g., Counterparty Signer) and the frameAncestor, which is the hostname of the parent page where the iframe element will live. The result is a URL ready for use in the application client.
Loading the Embedded Signature Experience
In order to load the embedded signature experience, simply set the URL obtained above as the iframe src. This will automatically begin loading Ironclad Signature within the iframe.
Important: To prevent the iframe from showing a white background while loading, set visibility: hidden. Then, be sure to set the style.visibility of the iframe to visible once the load event fires.
Listening For Events
The embedded signature frame sends events to the parent page.
There are various events that you can listen to using an event listener. Once you have attached an event listener to the iframe, you may see the following events:
type IframeToParentMessageData =
    // Triggered when the application has loaded and the contract is ready to sign
  | { type: 'load' }
    // Triggered when the signer reassigns the signature request to another email address
  | { type: 'reassign' }
    // Triggered when the signer declines to sign the contract
  | { type: 'decline' }
    // Triggered when the signer fully signs and completes the signature process
  | { type: 'sign' }
    // Triggered when the application encountered an error
    // The action param indicates which event immediately preceded the error
  | { type: 'error', action: string }
Example Skeleton Listener
// client-side
// style this via classnames/CSS stylesheets to set height/width
<iframe
    id="my-iframe"
	src="<URL from POST .../recipient-urls/embedded>"
	sandbox="allow-scripts allow-forms allow-same-origin allow-popups allow-downloads"
/>function handleMessage(message: MessageEvent) {
if (message.origin !== IRONCLAD_IFRAME_ORIGIN) {
return;
}
switch (message.data.type) {
case 'load':
// loaded, can now present iframe if not already displayed
case 'reassign':
// the signer reassigned the signature request to another email address
// *note: this option can be disabled in workflow designer
case 'decline':
// the signer declined to sign, proceed accordingly
case 'sign':
// the signer successfully signed the contract in full,
// you may now allow them to move forward in the process
case 'error':
// an error occurred
default:
console.error('invalid message', { message });
}
}
const iframe = document.getElementById('my-iframe');
iframe.addEventListener("load", () => {
window.addEventListener("message", handleMessage);
});Updated 2 months ago