Ironclad Repository to Entities Migration Guide
Overview
This guide provides a comprehensive overview of the steps required to effectively plan and implement the migration of your counterparty data from the Ironclad Repository to the new Entities framework. Historically, customers have managed counterparty data within the repository as a related record to workflows. With the introduction of the new Entities framework, Ironclad customers now have the flexibility to separate their counterparty data from the repository, enabling them to be mapped to workflows by the counterparty object. Although there isn’t currently an automated way to complete this migration, this sequence of steps will help Ironclad customers plan and execute an effective migration strategy.
| # | Phase | Key Activities |
|---|---|---|
| 1 | Planning & Preparation | Assess, scope, prepare |
| 2 | Configure Entity Settings | Setup relationships, permissions |
| 3 | Export & Transform Data | Export, clean, validate |
| 4 | Create Entities | Import, verify |
| 5 | Connect Entities to Records | Link using chosen method |
| 6 | Update Workflows | Modify, test configurations |
| 7 | Validation & Testing | Test, validate, UAT |
| 8 | Go-Live & Post Migration | Deploy, monitor, optimize |
Phase 1: Planning & Preparation
1.1 Assess Current State
- Inventory existing counterparty records in the repository
- Document current workflow dependencies
- Identify custom fields and metadata that need migration
- Note any integrations that rely on counterparty data
1.2 Define Migration Scope
- Determine which counterparty records to migrate
- Establish timeline and resource allocation
- Identify stakeholders and communication plan
- Create backup of existing data
1.3 Create Migration Checklist
- All counterparty records identified
- Custom fields mapped to entity properties
- Workflow dependencies documented
- Testing environment prepared
- Rollback plan established
Phase 2: Configure Entity Settings
This configuration step presents a valuable opportunity to not only map your existing entity properties to Ironclad's schema, but also to clean up and optimize your counterparty data during the migration process. Take advantage of this moment to standardize naming conventions, consolidate duplicate entries, validate data completeness, and establish consistent formatting rules that will improve data quality across both systems going forward
2.1 Set Up Entity Relationship Types
Before creating entities, configure the relationship framework that will define how entities interact with each other and with records.
Steps:
- Navigate to Company Settings → Entities
- Click on Relationship Types
- Define relationship types that match your business needs:
- Vendor/Customer relationships
- Partner relationships
- Custom relationship types
Reference: Create & Manage Relationship Types and Entity Properties
2.2 Configure Entity Permissions
Establish proper access controls to ensure data security and compliance.
Permission Levels to Configure:
- View permissions: Who can see entity data
- Edit permissions: Who can modify entity information
- Create permissions: Who can create new entities
- Delete permissions: Who can remove entities
Steps:
- Go to Company Settings → Groups → Configure Group → Repository and Entities
- Configure access controls
Reference: Entity Permissions Overview
Phase 3: Export & Transform Data
3.1 Export Counterparty Records
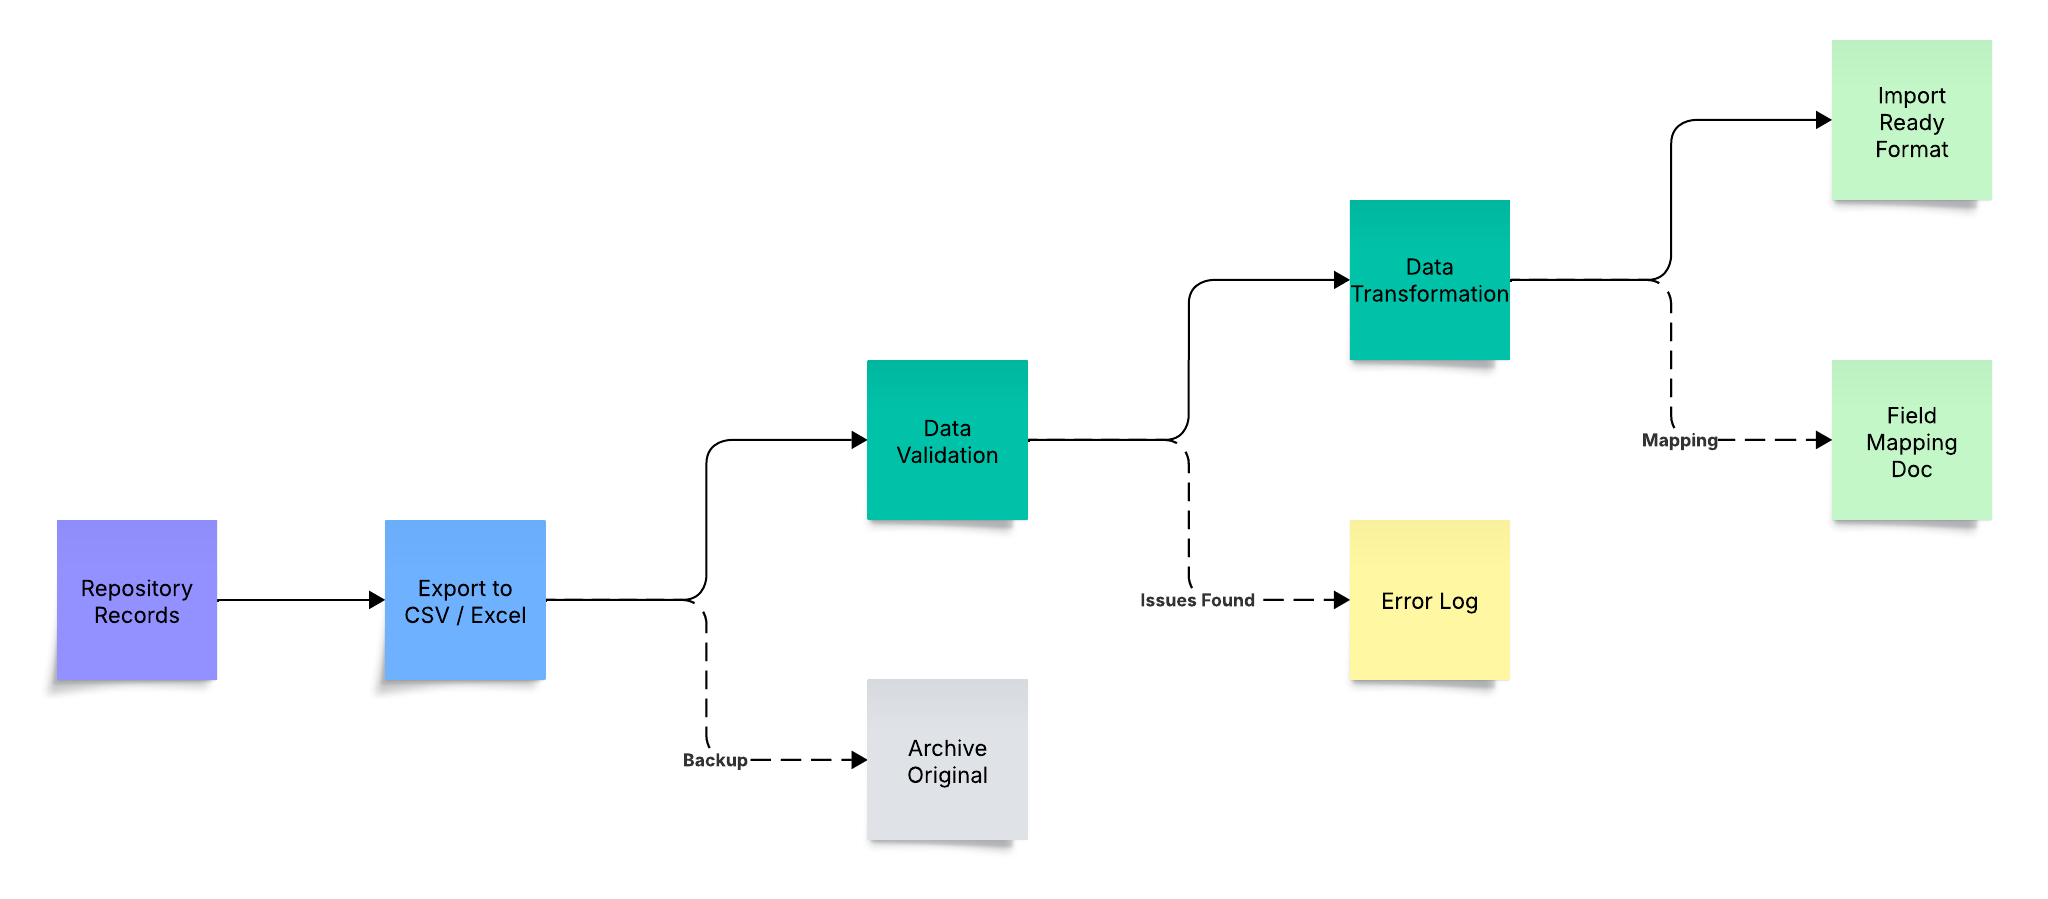
Export Process:
- Navigate to the Repository
- Apply filters to select counterparty records
- Export records to spreadsheet format
- Include all relevant metadata and custom fields
3.2 Data Transformation Checklist
Prepare your exported data for entity import:
- Remove duplicate entries
- Standardize naming conventions
- Validate required fields are populated
- Format dates consistently (MM/DD/YYYY or DD/MM/YYYY)
- Clean up special characters
- Add entity relationship columns if needed
Phase 4: Create Entities
4.1 Import Transformed Data
Import Steps:
- Navigate to Entities section
- Click Import Entities
- Upload your prepared spreadsheet
- Map spreadsheet columns to entity fields
- Review mapping and validate data
- Execute import
Best Practices:
- Start with a small batch (10-20 records) for testing
- Verify import results before proceeding with full dataset
- Document any import errors for troubleshooting
References: Create Entities from Existing Data
Update Entity Data Using Metadata Export and Import
4.2 Verify Entity Creation
- Confirm all entities imported successfully
- Check that custom properties populated correctly
- Validate entity relationships are established
- Review any import warnings or errors
Phase 5: Connect Entities and Records
5.1 Choose Connection Method
| AI Suggestions - RunAI | Metadata Import | Ironclad API | Manual Linking | |
|---|---|---|---|---|
| Best for: | Large volumes (batches of 2,500 documents) with pattern recognition | Large volume,structured data with clear mappings | Automated integrations & bulk operations | Small volumes |
| Speed: | Fast | Very Fast | Rate Limited | Slow |
| Accuracy: | High | Very High | Very High | Error prone |
5.2 Method 1: AI Suggestions (RunAI) - Recommended
For batch processing of entity connections:
- Navigate to the Records section
- Select records that need entity connections
- Click Run AI Suggestions
- Review AI-suggested entity matches
- Approve or modify suggestions
- Apply connections in batches
Benefits:
- Faster processing for large volumes
- Pattern recognition for accurate matching
- Batch approval capabilities
Reference: Use AI Suggestions to Tag Entities on Records
5.3 Method 2: Metadata Import
For structured bulk connections:
- Prepare a CSV with:
- Record IDs
- Entity IDs or names
- Connection type
- Navigate to Import → Metadata Import
- Upload connection mapping file
- Validate and execute import
Reference: Connect Entities and Records
5.4 Method 3: Ironclad API - For Automated Integrations
For programmatic bulk operations and system integrations:
The Ironclad API provides comprehensive endpoints for entity management and connection operations. This method is ideal for organizations with technical resources who need to automate the migration process or integrate with other systems.
Available API Endpoints:
| Operation | Method | Endpoint | Purpose |
|---|---|---|---|
| Get Relationship Types | GET | /public/v1/entities/relationship-types | Retrieve all entity relationship configurations |
| List Entities | GET | /public/v1/entities | Get all entities with filtering options |
| Create Entity | POST | /public/v1/entities | Create new entities programmatically |
| Retrieve Entity | GET | /public/v1/entities/{id} | Get specific entity details |
| Update Entity | PATCH | /public/v1/entities/{id} | Modify existing entity properties |
| Delete Entity | DELETE | /public/v1/entities/{id} | Remove entities from the system |
Implementation Steps:
- Authentication Setup
- Generate API credentials in Ironclad settings
- Configure authentication headers
- Test connection with a simple GET request
- Bulk Entity Creation
# Example: Create entities via API
  POST /public/v1/entities
     {
     "name": "Acme Corporation",
     "type": "vendor",
     "properties": {
       "industry": "Technology",
       "location": "San Francisco"
     }
}-
Establish Entity-Record Connections
- Query existing records via API
- Map record IDs to entity IDs
Reference: Entity References in Workflows and Records
-
Validation
- Use GET endpoints to verify entity creation
- Confirm relationship mappings
Requirements:
- Technical expertise (developers/IT team)
- API access permissions
- Programming knowledge (Python, JavaScript, etc.)
- Error handling and retry logic implementation
Reference: Ironclad API Developer Documentation
Reference: Connect Entities and Records - All Methods
5.5 Method 4: Manual Linking
For complex or one-off connections:
- Open individual record
- Navigate to entity connection field
- Search and select appropriate entity
- Save connection
Phase 6: Update Workflow Configuration
6.1 Workflow Migration Strategy
6.2 Update Workflow Designer
Steps for each affected workflow:
- Open Workflow Designer
- Navigate to counterparty lookup fields
- Change field type from "Related Record" to "Entity Lookup"
- Configure entity lookup settings:
- Select entity type
- Set search parameters (note: search/filter parameters are more robust for entity object compared to related records)
- Update any dependent logic
6.3 Update Workflow Components
Components to review and update:
- Forms: Update counterparty selection fields
- Approvals: Modify routing based on entity properties
- Integrations: Update API calls to use entity IDs
- Reports: Adjust to pull from entity data
- Notifications: Update merge tags for entity fields
Reference: Configure Entities in Workflow Designer
Phase 7: Validation & Testing
7.1 Testing Checklist
Data Validation:
- All counterparty records successfully migrated to entities
- Entity relationships correctly established
- Custom properties populated accurately
- No data loss or corruption
- Record → Entity mappings are correct
Workflow Testing:
- Entity lookups function correctly
- Workflow routing works as expected
- Integrations properly handle entity data
- Reports display accurate information
7.2 User Acceptance Testing
- Select test users from different departments
- Provide test scenarios covering common use cases
- Document feedback and issues
- Address concerns before full rollout
7.3 Performance Validation
- Monitor system performance post-migration
- Check query response times
- Verify bulk operations efficiency
- Ensure no degradation in user experience
Phase 8: Go-Live & Post-Migration Activities
8.1 Communication & Training
- Announce completion to all stakeholders
- Provide training on new entity features
- Share documentation and quick reference guides
- Establish support channels for questions
8.2 Monitoring & Optimization
- Track entity usage patterns
- Gather user feedback
- Optimize entity search and filtering
- Refine permissions as needed
8.3 Documentation
- Update internal process documentation
- Record lessons learned
- Create troubleshooting guide
- Document custom configurations
Support Resources
- Ironclad Support Center
- Ironclad Professional Services for complex migrations
- Ironclad Partner Ecosystem
Conclusion
Successfully migrating from repository-based counterparty management to the Entities framework requires careful planning, systematic execution, and thorough testing. By following this guide and leveraging the provided resources, you can ensure a smooth transition that enhances your contract management capabilities while maintaining data integrity and workflow continuity.
Remember that this migration is not just a technical upgrade but an opportunity to optimize your counterparty data management, improve workflow efficiency, and enable more sophisticated reporting and analytics capabilities.
Updated 8 months ago