Dynamics 365 Setup
We assume that you are familiar with the basics of Dynamics 365 concepts, such as entities, forms and views. Although the connector can be used to integrate with any Dynamics module and even custom Model-Driven Apps, our guide assumes that the MS Dynamic Sales app is in use, with the standard Opportunity and Account tables that exist there. You will need a login that has appropriate privileges to create and update records in these tables, as well as the custom Agreement table that we create as part of this guide.
NOTE: Both Ironclad and Microsoft Power Automate have the concept of “workflows”. In the case of Ironclad, a workflow defines a contracting process for a particular type of agreement, while in Power Automate a workflow is a flow of actions that are taken in various integration scenarios (triggered by events, or run periodically on a schedule). In the guide that follows we will be clear about which type of workflow we are referencing as we describe the steps in configuring this solution. Whenever possible we will refer to Ironclad workflows as “workflows” and Power Automate workflows as “flows” for clarity.
Basic Setup
There are a few details you’ll need to configure in Ironclad and Dynamics 365 before configuring the actual integration flows using the Ironclad Power Automate Connector. Microsoft Dataverse connectors will be used to connect Dynamics 365 to Power Automate.
Dynamics 365 Setup
As mentioned in the Prerequisites section, we are assuming that MS Dynamics Sales is in use. To effectively support all examples in this guide, you will need to create three tables:
- Agreement Table: Our integration makes use of a custom table called Agreement, that represents an agreement to be made with an Account in general (such as an NDA or MSA) or connected to a specific Opportunity (such as an Order Form). We do this simply to demonstrate a particular solution approach that could be taken within MS Dynamics Sales - you can of course use any Dataverse tables in your environment to trigger Ironclad workflows if necessary.
- Workflow Table: This table will contain workflow IDs from Ironclad, which is needed for managing documents. While specifically designed for this example, this table can be reused for other workflows involving interactions between Ironclad and Dynamics 365.
- Workflow Documents Table: This table will be dedicated to storing document files. Maintaining a separate table for files is considered good practice as it promotes better data organization, improves integrity, and simplifies data retrieval and management.
Create the new Agreement table by going to the Power Apps app in your Dynamics environment, and navigate to Dataverse -> Tables. Create a new table and name it Agreement, and make sure to check the “Enable Attachments” option, since we will be adding notes to the Agreement to log approvals and also to attach the final contract document.
Add the following columns to the Agreement table (in addition to the standard columns that Dynamics creates automatically):
| Column name | Type | Notes |
|---|---|---|
| Account | Lookup | Set this as a lookup to the Account table, for agreements that are directly related to the account (such as NDAs). |
| Opportunity | Lookup | Set this as a lookup to the Opportunity table, for agreements that are related to specific opportunities with an account (such as Order Forms). |
| Agreement Number | Autonumber | Use any format you’d like for the auto-number sequence. We will send this to Ironclad to store on the workflow once it is launched. |
| Agreement Start Date | Date only | |
| Agreement Type | Choice | Add any choices you’d like, but ensure that one of the choices is “MSA”. Our launch flow will be triggered when an agreement with this type is created. |
| Agreement Value | Currency | |
| Counterparty Signer Email | ||
| Counterparty Signer Name | Single line of text | |
| Ironclad Workflow | URL | We will store a link to the Ironclad workflow here after it is launched. |
| Ironclad Workflow Status | Single line of text |
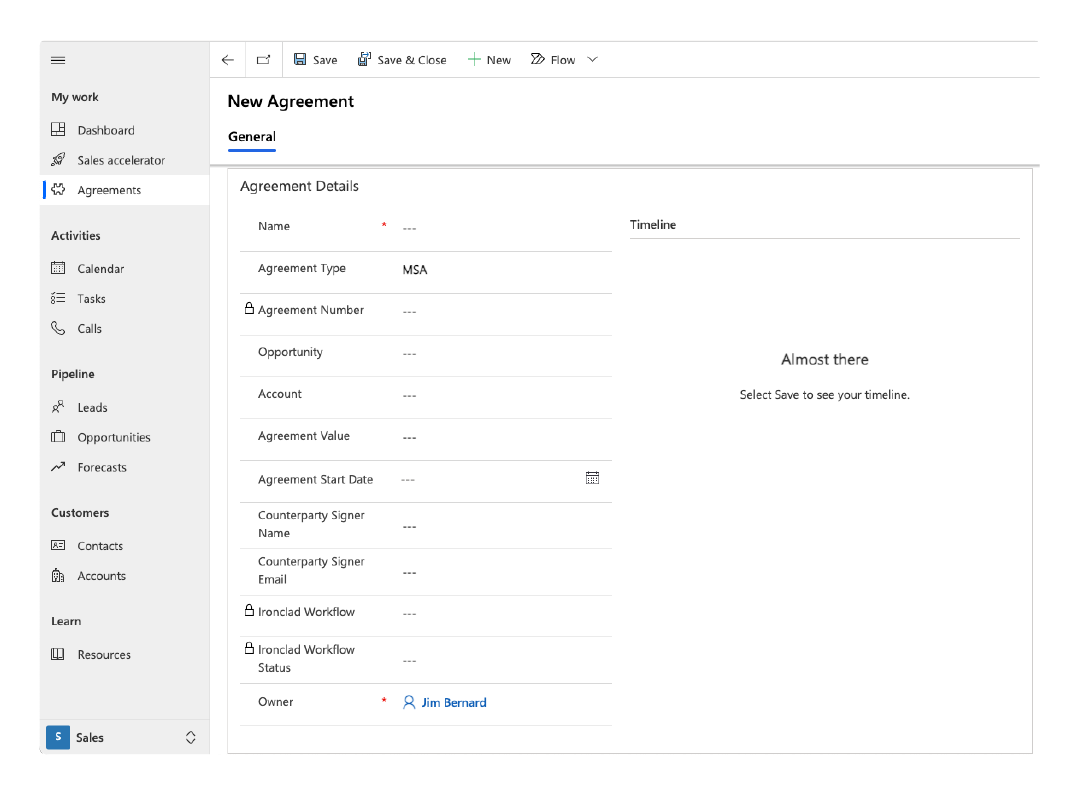
You should also update the default Form for the Agreement table, and add the Agreement table to your preferred Sales app in Dynamics so that you can easily create new Agreement records and see their status. Our example flows will also be using notes attached to the Agreement to show updates to the Ironclad workflow, so you should also add a Timeline component to the form so that those updates can be seen. As an example, the screen below shows a default form defined for the new Agreement table in Dynamics:

Create the new workflow table by going to the Power Apps app in your Dynamics environment, and navigate to Dataverse -> Tables. Create a new table and name it Workflow.
Add the following columns to the Workflow table (in addition to the standard columns that Dynamics creates automatically):
| Column name | Type | Notes |
|---|---|---|
| Name | Single line of text | |
| Ironclad ID | Single line of text | This column will be populated with the Ironclad Id workflow properties. |
| Agreement | Lookup | Set this as a lookup to the Agreement Table. |
| Workflow | Unique identifier | Establishes distinct identifier for relationship with Workflow Documents Table. |
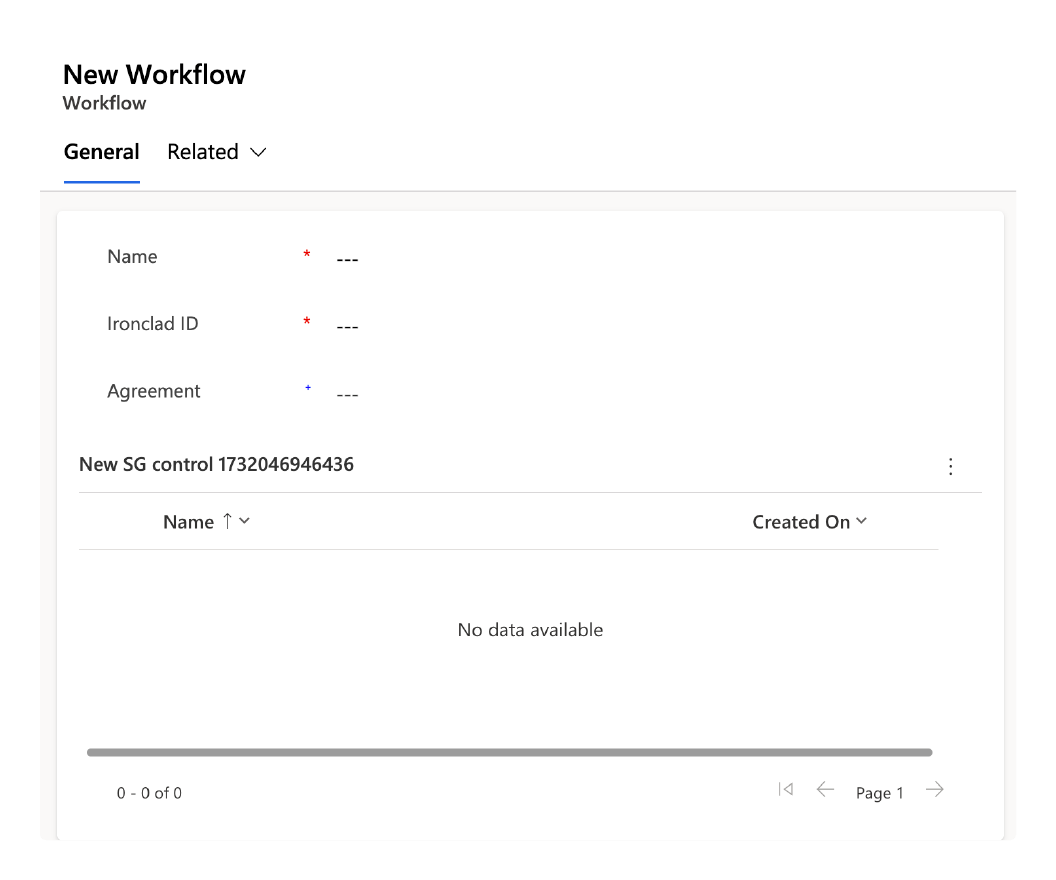
You should also add a New relationship for the Agreement Column in the Workflow table to have a many to one relationship with the Agreement Column in the Agreement Table. The image below shows the default form fields for the Workflow table.

Create the new workflow document table by going to the Power Apps app in your Dynamics environment, and navigate to Dataverse -> Tables. Create a new table and name it Workflow Document.
Add the following columns to the Workflow Document table (in addition to the standard columns that Dynamics creates automatically):
| Column name | Type | Notes |
|---|---|---|
| Name | Single line of text | |
| Unique Key | Single line of text | Distinct identifier for each document Ironclad document |
| File | File | Used for the document file |
| Workflow | Lookup | |
| Workflow Document | Unique identifier | Establishes distinct identifier for relationship with Workflow table |
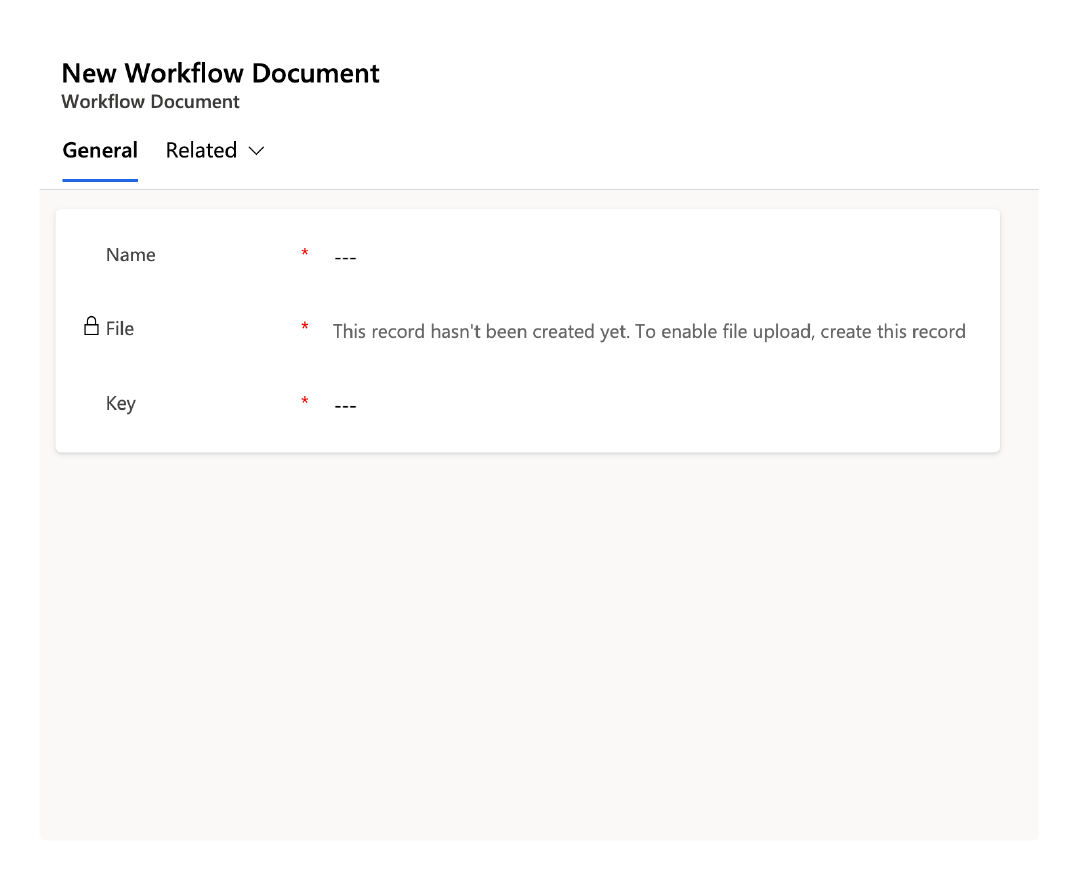
You should also add a New relationship for the Workflow Column in the Workflow Document table to have a many to one relationship with the Workflow Column in the Workflow Table. The image below shows the default form fields for the Workflow Documents table.

Updated 2 months ago
